10 Protective Styles with Hair Extensions That Actually Last
Protective styles with hair extensions are the gold standard for retaining length and keeping your natural hair tucked away while still looking polished and intentional every single day. When done right, they combine the best of a low-manipulation routine with the creative possibilities that extensions open up — you get weeks of beautiful hair without the daily styling stress, heat, or manipulation that causes most breakage. It's one of the most effective things I've done for my natural hair growth over the years.
The difference between a protective style that genuinely protects and one that quietly causes damage is usually in the details: the extension weight, the installation tension, the care routine while installed, and the take-down method. Heavy extensions installed too tightly, or styles left in weeks beyond their expiration date, turn a protective style into a breakage situation. I've made most of those mistakes myself, which is why I'm very specific now about which styles I recommend and which ones come with conditions.
Here are the protective styles with hair extensions I come back to repeatedly — the ones that hold up for weeks, look great from day one to day thirty-five, and actually leave my natural hair in better condition when I take them down.
Compare Protective Styles With Hair Extensions options
Shop hair extensions on Amazon to find the right type for your protective style — braiding hair, crochet packs, or pre-stretched options.
- Pre-stretched kanekalon braiding hair reduces frizz and installation time significantly
- Crochet hair installs faster and puts less continuous tension on the scalp than individual braids
- Look for extensions labeled 'lightweight' for styles you plan to wear 6+ weeks
- Synthetic braiding hair works beautifully — you don't need human hair for most protective styles
Compare Protective Styles With Hair Extensions on Amazon →
As an Amazon Associate, The Swag Hair may earn from qualifying purchases.
Key Takeaways
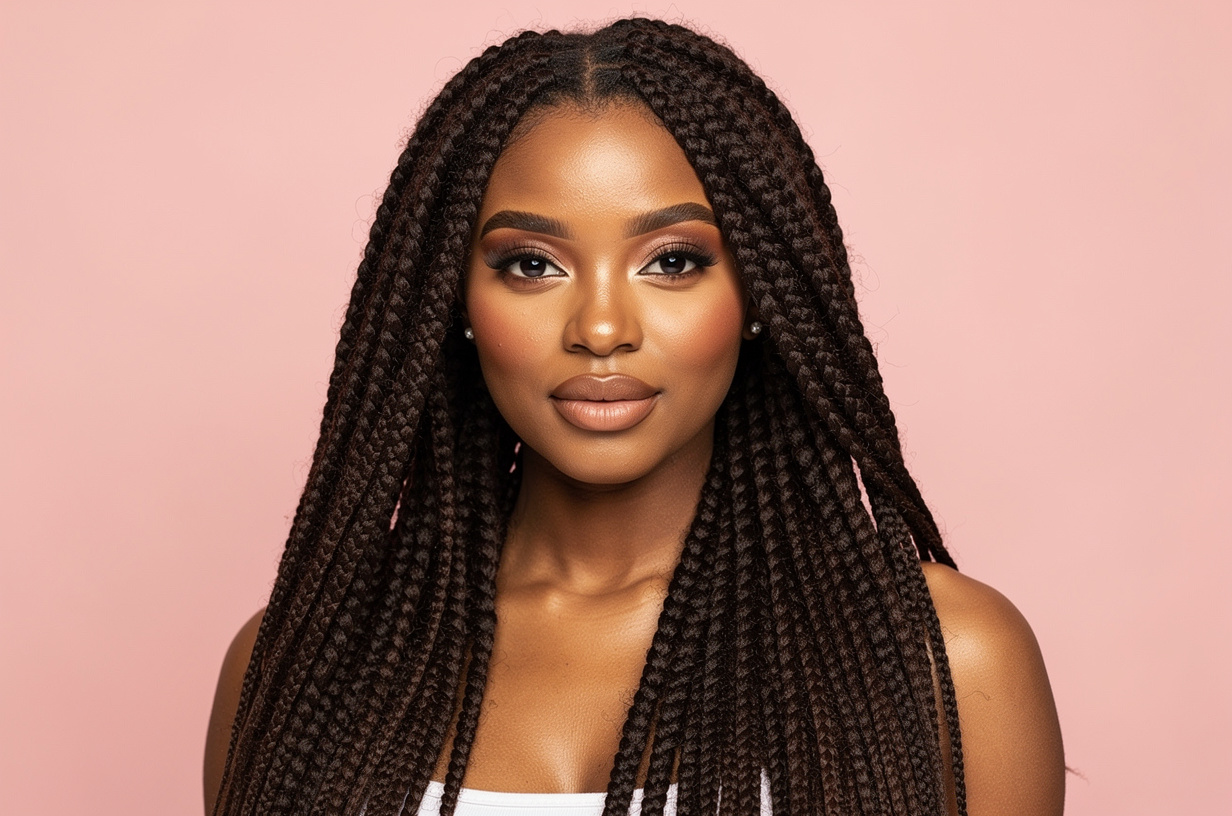
- Knotless braids start without tension at the root, making them one of the most edge-friendly protective styles available
- Faux locs can last 6–8 weeks and look more natural with each passing week as they settle
- Crochet styles cut installation time dramatically and reduce scalp tension by building on a cornrow base instead of individual braids
- Scalp moisture is non-negotiable — your natural hair still dries out even when it's protected
- Take any protective style down by the 8-week mark, no matter how it looks from the outside
Quick Access
What I check before recommending Protective styles with hair extensions
Before choosing a protective style, I always assess how long I actually want it in and how much I'm willing to maintain it. A 4-week style and an 8-week style look different, feel different, and need different extension choices. Knotless braids are my favorite for medium-term wear — the gradual addition of extension hair at the root means there's no initial tension knot at the base, so the style sits gently even on a sensitive hairline. For longer wear, I lean toward faux locs or Senegalese twists, which are less likely to unravel at the ends than box braids and tend to look more polished even in week six.
Extension quality and weight matter enormously for long-term protective styles, and this is where most people underestimate the impact. Heavy extensions put sustained, consistent tension on your follicles over weeks — a kind of stress that's very different from a tight ponytail you take down in hours. For anything worn 6+ weeks, I specifically look for pre-stretched or lightweight braiding hair, which has a softer texture, creates less bulk at the root, and puts significantly less strain on the hairline. The style might look slightly less full than an ultra-thick install, but your edges at week seven will reflect the difference.
I also check in with my stylist about tension before they start braiding or twisting. This sounds obvious, but many women don't speak up during installation because they don't want to seem difficult, and then they're in pain by the end of the day and dealing with tension bumps for the first week. A good stylist will always be open to adjusting — the braid can look perfectly neat without being tight enough to cause discomfort. If it hurts during the install, say something. Tension that hurts at the chair hurts the follicle for weeks.
Who Protective styles with hair extensions suits best
Protective styles with extensions are genuinely beneficial for a wide range of women, but they're most transformative for anyone in an active growth phase who wants to retain length without the daily manipulation risk. If you're growing out a fade, transitioning from relaxed to natural, or recovering from heat or color damage, a well-chosen protective style can give your hair weeks of uninterrupted rest while still looking beautiful and styled every day. The growth you retain during a months-long rotation of protective styles adds up in a way that you simply can't achieve with daily styling.
That said, protective styles work best for women who are genuinely willing to do the maintenance underneath. If the appeal is that you can completely forget about your hair for six weeks, you're going to take the style down to find dry, matted natural hair that needs serious recovery. The required maintenance is lighter than daily styling — a scalp moisture spray and oil twice a week takes five minutes — but it's not optional. Women who get the most out of protective styles treat them as a lower-maintenance routine, not a no-maintenance one.
Check Protective Styles With Hair Extensions prices before you buy
Shop hair extensions on Amazon to find the right type for your protective style — braiding hair, crochet packs, or pre-stretched options.
- Pre-stretched kanekalon braiding hair reduces frizz and installation time significantly
- Crochet hair installs faster and puts less continuous tension on the scalp than individual braids
- Look for extensions labeled 'lightweight' for styles you plan to wear 6+ weeks
- Synthetic braiding hair works beautifully — you don't need human hair for most protective styles
Check today’s Amazon options →
As an Amazon Associate, The Swag Hair may earn from qualifying purchases.
Comparison guide
| Choice | Best for | Watch out for |
|---|---|---|
| Knotless Box Braids | Growth retention with the least root tension — the knot-free start reduces hairline stress and keeps the style comfortable even at week 4–5 | Ends can unravel faster than traditional braids; seal ends with hot water dipping or a light mousse to significantly extend the life |
| Faux Locs | Long-term wear of 6–8 weeks with a boho look that gets better with age; marley or distressed hair wraps around natural hair with lower tension than full braiding | Thickness matters — heavy locs pull on follicles over time; request medium-sized locs and verify the weight before installation begins |
| Crochet Braids or Twists | Fast installation (2–4 hours vs 6+ for individual braids) on a pre-braided cornrow base with substantially less scalp tension across the style | The cornrow foundation must be done correctly — tight, uneven cornrows create tension bumps even under a crochet style that looks loose |
| Senegalese Twists | A polished, sleek look that lasts 4–6 weeks with minimal unraveling compared to box braids; excellent for professional settings and events | Full heads with thick twists can be surprisingly heavy; opt for a medium size and use lightweight kanekalon to keep the weight comfortable across weeks of wear |
How to choose the right look
Your upcoming schedule and lifestyle should influence your protective style choice just as much as aesthetics. If you have significant professional obligations, events, or travel in the next month, knotless braids or Senegalese twists offer a polished, structured look that works in formal and casual settings equally well. If you want maximum versatility — the ability to wear the style up, pulled back, or down depending on the day — longer braids or twists with enough extension length give you real options throughout the entire wear period.
Your current edge health is the other factor I always bring into the conversation before booking. If you've experienced recurring thinning at the temples, nape, or frontal hairline, you need a style that minimizes tension at those specific points. Crochet styles on a loose cornrow base, or faux locs installed with the crochet method rather than the braid-and-wrap method, eliminate most of the root tension while still delivering a full, beautiful look. Your stylist should evaluate your hairline before beginning — if they don't, bring it up yourself.
Buying checklist
| Check | Why it matters |
|---|---|
| Decide your ideal wear length before booking your appointment | 4-week and 8-week styles require different extension weights, thicknesses, and scalp care commitments to be sustainable |
| Deep condition your natural hair 24–48 hours before installation | Hydrated hair braids more easily, experiences less friction, and starts the protective period in the best possible condition |
| Tell your stylist your tension preference before they begin | Tension that feels acceptable during installation can cause soreness, bumps, and follicle stress within 24 hours |
| Set up a scalp moisture routine before the install goes in | Your natural hair under the style still dries out — flaking and itching from dryness cause scratching that disrupts the style and the scalp |
| Mark your take-down date on your calendar before you leave the salon | Shed hairs tangle into braids and cause matting that escalates rapidly after 8 weeks, regardless of how the style looks from the outside |
Maintenance that keeps the result pretty
Scalp moisture is the single most important maintenance step for any extension-based protective style, and it's the one most consistently skipped. Your scalp doesn't stop producing oil or needing hydration just because it's covered — if anything, covered scalp skin can get drier faster because it's not getting the benefits of your wash routine. I use a spray bottle with a 1:3 ratio of leave-in conditioner to water and spritz it directly along all my parting sections twice a week, immediately followed by a light jojoba or castor oil to seal. This takes about five minutes per session and prevents the itching, flaking, and irritation that make people take protective styles down early.
Edge care throughout the wear is the second non-negotiable. The hairline is the most fragile part of your hair and the first place where prolonged extension tension shows up as damage. I apply a light oil or edge-specific treatment to my temples, nape, and frontal hairline every two to three days — not a wax-based edge control, which builds up and can suffocate follicles, but a nourishing oil or a water-based gel that keeps the area moisturized. I also make sure my bonnets and scarves are sitting gently, not pulled tightly over the front hairline, because even nighttime pressure on an already-stressed edge can compound the tension from installation.
Common mistakes to avoid
The biggest protective style mistake I see is choosing extensions that are too long and too thick in one go. Waist-length braids look stunning on social media, but the sustained weight on your scalp and follicles over six to eight weeks adds up in ways you can't see from the outside. I've watched women take down styles that looked perfect only to find significant thinning at the nape and temples — damage directly caused by the extension weight, not the style itself. Start with medium thickness and a length you've actually worn before. You can always add length next time once you know how your scalp handles it.
The take-down is the other major mistake point, and it's where a lot of the protective benefit gets erased in a single afternoon. Women who've spent six weeks in braids want them out quickly, and that urgency leads to forceful pulling, snapping, and tearing at tangled sections. The shed hairs that have collected inside the braids over six weeks need to be gently worked out from bottom to top — not yanked from root to end. Set aside a full day, work in sections, use a detangling conditioner or oil generously, and don't force a single knot. A careful take-down is the difference between protective and counterproductive.
When to spend more and when to save
When to spend: on your installation. A skilled, experienced braider who knows the difference between firm and damaging tension is worth paying for, especially if you're doing a style that touches your hairline. Protective style installations typically run $150–$300+ depending on length, complexity, and your location, and that price reflects real expertise. Hairline thinning caused by chronic tension from poorly installed styles can take months or years to reverse — the cost of treatment and regrowth products far exceeds what you'd save by booking the cheapest option.
When to save: on the extension hair itself. This is one area where budget-friendly options genuinely compete with expensive ones. Braiding hair brands like X-Pression, Outre, and Freetress use the same core kanekalon synthetic fiber as premium alternatives, and the difference in longevity and feel is minimal for most protective styles. Buy the recommended pack count — usually 5–8 packs for a full head depending on thickness — and pre-stretch the hair yourself at home before your appointment to reduce frizz without spending extra on pre-stretched premium versions.
Final styling advice
A high bun or puff is the fastest way to get a completely different look from the same protective style without touching the install itself. Gathering your braids or twists into a loose, high bun held with a large scrunchie takes under two minutes and instantly shifts the style from casual to polished — the kind of switch that makes you feel like you have two hairstyles for the price of one. I wear mine down for casual days and up for workouts and professional settings, and it keeps the style feeling fresh and versatile throughout the entire wear period.
For the front sections specifically, a few face-framing braids or twists pulled gently forward and slightly toward the cheekbones create a softer, more flattering frame than everything pulled back tight. You can also run a small amount of clear edge-smoothing gel along the first inch of your braids at the hairline for a polished, laid-down look that holds even in humidity. This is especially useful in week four or five when the natural hair at the perimeter starts to show new growth or frizz — it's a quick refresh that adds another week of looking intentional without any real work.
Before you reach the FAQs, compare current Protective styles with hair extensions options, reviews and prices side by side.
View Protective Styles With Hair Extensions on Amazon →
As an Amazon Associate, The Swag Hair may earn from qualifying purchases.
FAQ
How long can I safely keep a protective style with extensions in?
Most stylists recommend 4–8 weeks for braided and twisted protective styles. Beyond 8 weeks, the shed hairs that have collected inside the braids begin to mat and tangle, and removal becomes increasingly damaging regardless of how careful you are. If the style still looks acceptable at week 8, it's still time to take it down.
Do protective styles actually help hair grow?
Protective styles don't cause growth — your hair grows from the scalp at a fixed rate no matter what style you're wearing. What they do is dramatically reduce the breakage and manipulation that prevents you from retaining that growth, which is why hair appears to grow faster during long-term protective style rotations.
What's the best protective style for damaged or thinning edges?
Crochet styles on a loose cornrow base or faux locs installed with the crochet method put the least tension on the hairline. Avoid any style that requires individual braiding or twisting tension right at the temples, nape, or frontal area if those spots are already compromised — tension damage there is cumulative and slow to reverse.
Should I wash my hair while it's in a protective style?
Yes — scalp washing every 2–4 weeks while installed prevents product buildup and keeps the scalp healthy underneath. Use a diluted shampoo in a spray bottle, apply directly to the scalp along the parting sections, massage gently with your fingertips, and rinse carefully. Let the style air dry completely before tying it up or going to bed.
How do I take down a protective style without causing breakage?
Apply a generous amount of detangling conditioner or oil to each braid or twist before beginning, and work from the very end upward toward the root — never from root to end. Take your time, work in sections, and gently finger-detangle the shed hair that has collected inside as you go. Rushing the take-down causes more breakage than most protective styles ever do.
Final verdict
Protective styles with hair extensions are one of the most effective tools available for natural hair growth and length retention — but only when you choose the right style for your hair's current state, install it at a safe tension level, maintain the moisture underneath throughout the wear, and take it down on schedule. The style itself is almost secondary to those four factors. Get them right, and any of these options — from knotless braids to crochet faux locs to Senegalese twists — can deliver weeks of gorgeous, low-maintenance hair while your natural hair does exactly what you want it to do: rest, hydrate, and grow.