Hair Extension Color Blending Ideas for a Seamless, Salon-Quality Match
The first time I clipped in a set of extensions that didn't quite match, I learned a hard lesson standing under bathroom light: blending isn't about buying the closest box-label color, it's about layering tones the way a colorist would. Hair extension color blending ideas get thrown around like there's one trick that fixes everything, but in practice it's a handful of small techniques stacked together — shade mixing across wefts, root shadowing, and placement that follows where your natural color actually falls.
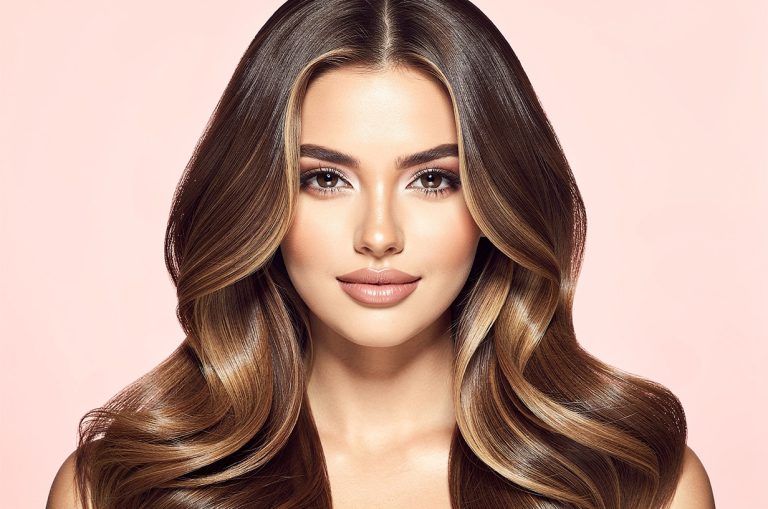
What changed things for me was realizing that hair rarely grows in one flat color. Even 'level 6 brown' hair has warmer pieces near the crown, cooler ends from sun exposure, and a few lighter strands framing the face. Extensions that come in a single uniform tone will always look slightly artificial next to that, no matter how close the swatch seemed online. The fix is buying multi-tonal wefts or blending two adjacent shades yourself, then placing them with that natural variation in mind.
This guide walks through the ideas that actually move the needle: how to choose blended shades, where the common mistakes happen, and how to keep the blend looking fresh as your own hair color shifts with the seasons. I'm covering clip-ins, tape-ins, and sew-ins, since the blending logic changes slightly depending on how permanent the install is.
Compare Hair Extension Color Blending Ideas options
Before you buy, line up the shade card against a photo of your hair in daylight and compare weft thickness, not just the color number.
- Match in natural daylight, not indoor bulbs
- Check the weft's tonal variation, not just one swatch
- Confirm the fiber type matches your styling habits
- Buy one weft to test before committing to a full set
Compare Hair Extension Color Blending Ideas on Amazon →
As an Amazon Associate, The Swag Hair may earn from qualifying purchases.
Key Takeaways
- Multi-tonal wefts blend better than single-shade extensions, even when the single shade looks like a perfect match on a card
- Root shadowing one to two shades darker at the top hides the demarcation line better than any clip-in placement trick
- Balayage and ombre looks are easiest to fake with hand-tied or tape-in wefts cut at an angle, not blunt clip-ins
- Test color matches in daylight near a window, never under bathroom LEDs, which wash out warmth and ash tones
- Re-blend every few months since natural hair color drifts with sun exposure and salon touch-ups, even if you never go lighter
Quick Access
What I check before recommending Hair extension color blending ideas
Before I recommend any set for blending, I check whether the wefts are dip-dyed or rooted, meaning the color shifts naturally from a darker base to lighter ends rather than being flat top to bottom. Flat color is the single biggest reason extensions look like a wig instead of an extension of your own hair. Rooted or balayage-style wefts already do half the blending work before you even clip them in.
I also look at how the brand describes their shade range. The best ones list undertones, not just a number — 'warm caramel' versus 'level 8 ash blonde' tells you far more than a generic chart. And I check return policies, because shade matching from a photo is never a sure thing, and a brand that won't accept an exchange on an unworn, tagged weft is one I steer people away from.
Who Hair extension color blending ideas suits best
Color blending ideas matter most for anyone whose natural hair has any depth or movement to it at all — which is most people. If you have balayage, highlights, grown-out roots, or even just hair that gets a little lighter in summer, a single flat-toned extension set will sit on top of your hair rather than disappearing into it.
It also matters a lot for anyone using extensions to add length rather than just volume. Length pieces hang past your natural ends and catch the most light, so any mismatch is more visible than with a volumizing set tucked under the crown. If that's your main use case, spend the extra few minutes getting the blend right before you buy.
Check Hair Extension Color Blending Ideas prices before you buy
Before you buy, line up the shade card against a photo of your hair in daylight and compare weft thickness, not just the color number.
- Match in natural daylight, not indoor bulbs
- Check the weft's tonal variation, not just one swatch
- Confirm the fiber type matches your styling habits
- Buy one weft to test before committing to a full set
Check today’s Amazon options →
As an Amazon Associate, The Swag Hair may earn from qualifying purchases.
Comparison guide
| Choice | Best for | Watch out for |
|---|---|---|
| Clip-in wefts | Occasional wear, easiest DIY blending with a hand-mix of two shades | Bulkier wefts can show a line if not feathered into thin sections |
| Tape-in extensions | Seamless everyday wear, great for root shadowing and balayage looks | Harder to swap shades later; commit to the right blend upfront |
| Sew-in wefts | Long-term wear and maximum blending control with a stylist | Needs professional install; DIY color blending mistakes are costly to fix |
| Halo extensions | Fast volume and length with zero clips to hide | Only one visible layer, so the shade match has nowhere to hide if it's off |
How to choose the right look
Start with your mid-lengths, not your roots, as the reference point. Roots are almost always darker than the rest of your hair, so matching to them gives you extensions that read too dark once they're blended through your whole head. Pull a small section from ear-level, check it in daylight, and match the extension's dominant tone to that.
Then decide if you need one shade or a custom blend of two. If your hair has noticeable warmth, dimension, or grown-out color, buying two adjacent shades and hand-mixing them weft by weft will look more convincing than any single 'multi-tonal' pack. It takes longer to set up but the blend holds up far better in photos and under bright light.
Buying checklist
| Check | Why it matters |
|---|---|
| Matched in daylight, not indoor lighting | Indoor bulbs shift warm and cool tones and hide real undertone differences |
| Compared to mid-length hair, not roots | Roots are darker and will make the match read too dark overall |
| Checked for rooted or dip-dye color in the weft | Flat single-tone wefts blend the worst regardless of shade accuracy |
| Confirmed weft thickness suits your hair density | Too-thick wefts create visible bulk even with a perfect color match |
| Reviewed the return or exchange policy | Shade matching from photos fails often enough that you'll want options |
Maintenance that keeps the result pretty
Once the blend is right, keeping it that way takes a little upkeep. Natural hair color shifts with the seasons — summer sun lightens it, while winter and salon glosses can deepen it again — so a blend that was perfect in June might read a shade off by October. I check my blend every few months by holding a weft against fresh-washed hair in daylight.
Washing extensions less often than your natural hair also helps preserve the blend, since the wefts fade differently than hair that's getting product, heat, and sun exposure daily. Use a sulfate-free shampoo on the extensions and store them dry and out of direct light between wears so the color stays true to the shade you matched.
Common mistakes to avoid
The biggest mistake I see is buying based on the product photo's filtered lighting rather than the actual shade chart underneath. Marketing photos are often shot with warm, flattering light that makes every shade look a little more golden and expensive than it is. Always cross-check against the brand's raw, unedited shade swatch before ordering.
The second mistake is placing all the wefts in uniform horizontal rows. Even a well-matched color can look fake if it's installed in flat layers, since real hair doesn't fall that way. Stagger the placement, feather a few face-framing pieces shorter than the rest, and let the rooted or dip-dyed color do its job by following the natural fall of your hair.
When to spend more and when to save
Spend on the pieces that frame your face and sit closest to your part line — these are the ones everyone's eyes go to first, and a slightly more expensive, better-blended weft here makes the whole set look more convincing. A premium tape-in or hand-tied weft along the part is worth the extra cost.
Save on the volumizing wefts tucked underneath at the crown and nape, where blending is more forgiving since they're layered under your natural hair. A slightly less precise color match disappears once it's buried under a few inches of your own hair, so this is the place to use the budget-friendly option in your set.
Final styling advice
Once everything's installed and blended, a loose curl or wave through the whole head — extensions included — does more to disguise any remaining color seams than a flat-iron sleek style would. Texture breaks up the line of sight along each weft and makes minor tonal differences far less noticeable.
A light dusting of dry shampoo at the roots also helps mute any shine difference between your natural hair and the extension fiber, which can otherwise catch light differently and draw attention to where one ends and the other begins. It's a small step, but it's the one that takes a good blend to looking completely undetectable.
Before you reach the FAQs, compare current Hair extension color blending ideas options, reviews and prices side by side.
View Hair Extension Color Blending Ideas on Amazon →
As an Amazon Associate, The Swag Hair may earn from qualifying purchases.
FAQ
How many shades should I mix for a natural blend?
Two adjacent shades is usually enough for most heads. Going much further apart than that tends to look like deliberate highlights rather than a natural blend, unless that's the specific balayage effect you're after.
Can I dye extensions to match my hair better?
Real human hair extensions can usually be toned slightly darker with a demi-permanent dye, though lightening synthetic-blend wefts often damages the fiber. When in doubt, buy closer to your natural shade rather than planning to lighten afterward.
Do rooted extensions work for blonde hair too?
Yes, and they're especially useful for blondes since natural blonde hair almost always carries warm and cool variation. A rooted or dip-dyed blonde weft blends far more convincingly than a single flat platinum tone.
How often do I need to rematch my extension color?
Check every three to four months, or any time you get a salon color service. Sun exposure and gloss treatments both shift natural hair color gradually enough that you might not notice until the extensions suddenly look mismatched.
Is it worth paying more for hand-tied wefts just for blending?
If face-framing placement and a seamless look matter to you, yes. Hand-tied wefts are thinner and taper naturally, which makes even a close-but-not-perfect color match far less noticeable than it would be in a thicker, machine-made weft.
Final verdict
Good hair extension color blending isn't really about finding a magic single shade — it's about layering tone, placement, and texture the way your own hair already does it naturally. Start with a rooted or multi-tonal weft, match it against your mid-lengths in daylight, place the better pieces near your part, and let a little wave or texture finish the job. Do that, and the blend stops looking like an extension and starts looking like just more of your hair.